How To
A Dozen Ducks in a Row: Your Tactical Poultry Processing Prep Sheet for Summer
Whether you’re a seasoned pro or prepping for your very first DDay (Dispatch Day), your ducks need to be in a row—tight, tidy, and executed with military precision. This is your PPS Guide Sheet: a tactical checklist to help you plan, prep, and process like a pro.
Duck #1 – Bird Collection
Collection must be smooth, safe, quiet, and gentle. Riled-Up Birds (RUBs) carry that stress into processing day. They remember. Your collection crates (CCs) should be clean, secure, and free of sharp edges or booby traps. No thin ribbing that can trap toes. The birds will tell you when something hurts—listen up. Use red-light headlamps or night vision to minimize stress. And don’t forget to take them off feed 18 hours before DDay to empty crops.
→ Pro tip: Use gravity and leverage when handling crates. Slide them onto angled ramps or stacked crates instead of lifting. Fewer lifts = happier back.
Duck #2 – Pasture Location
Your Mobile Coop Pasture Location (MCPL) should be planned well in advance. Ideally, it’s close to the processing site with an easy, non-bumpy ride for crate transport. If you’re traveling to a processor, this is where your responsibility ends—but use the remaining ducks to evaluate their setup. Keep birds dry and at a comfortable temperature overnight (which may mean keeping them warm or cool depending on the weather).
Duck #3 – Recruits
Invite everyone at first—especially if you’re just starting out. You don’t yet know who fits where. Over time, you’ll develop a team of elite poultry processing commandos (EPCs). These folks have hundreds—if not thousands—of confirmed kills (CKs or “clucks”). It takes repetition, not book learning, to earn your EPC wings. Waterfowl specialists deserve extra kudos—ducks and geese are practically bulletproof.
Duck #4 – Assigning Stations
Matching Recruits to Stations is pure chaos at first. Let it unfold. Everyone grabs an apron and starts somewhere. Wives, daughters, and female Recruits often avoid dispatch but make exceptional operators at scald, pluck, gut, and QC. Let people rotate and find their fit.
→ Pro tip: Recruits gain confidence faster when they can try different stations—let it unfold naturally.
Duck #5 – What is a Station?
Primary Stations:
- Dispatch
- Scald
- Pluck
- Gut
- Quality Control (QC)
- Chill
- Cut Up (optional but valuable)
- Packaging
Gutting Sub-Stations:
- Head and Feet Removal
- Neck and Vent Opening
- Crop Loosening
- Gut Removal
- Heart and Liver Separation
- Gizzard Separation (optional)
- Lung Removal
- Bonus: Oil Gland Removal (for older birds)
Thirty-second Gutters wear Golden Wings. Watch one work and you’ll understand why.
Duck #6 – Dispatch Station
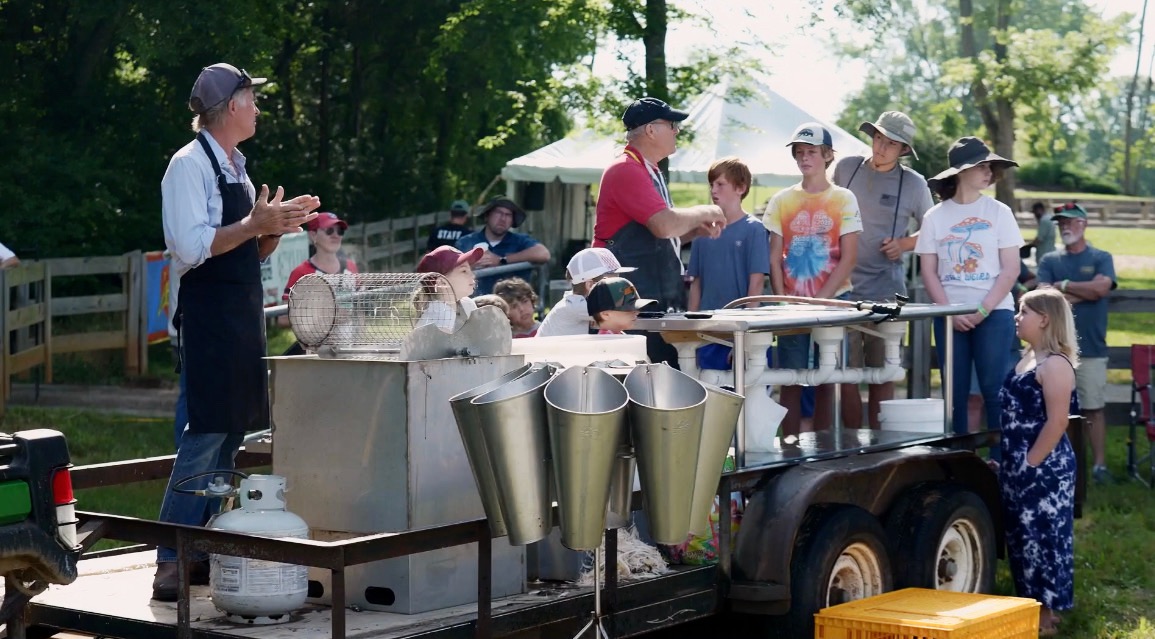
The Dispatch Station (DS) needs:
- Well-mounted, round cones (2–3x your scalder capacity)
- Very sharp knife with scabbard or safe resting place
- Cut-protection gloves (optional)
- Veggie spray on all bloody surfaces
- Blood collection plan
Never cause spinal trauma. Learn anatomy. This is sacred work. It’s a harvest, dispatch, or sacrifice—a contract fulfilled with care and gratitude.
Duck #7 – Scald Station
As goes the scald, so goes the day. Prep ahead:
- Clean and test the scalder early
- Full propane tank
- Agitation method planned
- Dish detergent on hand
- Extra pot of boiling water for top-ups
- Two accurate thermometers
- Lid or cover for heat retention
→ Pro tip: Perfect scald = no resistance when pulling foot skin or feathers.
Duck #8 – Pluck Station
This is your big win moment. Perfect scalding makes plucking easy. But don’t go manual unless forced. Buy or rent a good plucker. Check:
- Fingers
- Hoses
- Motor sound
- Feather collection
→ Pro tip: Do not use extension cords. They reduce electron flow and overheat motors. PD (Plucker Dysfunction) is most often due to low voltage.
Duck #9 – Gut Station
Gutting stands out as the master task of processing—the one job not mechanized, entirely dependent on field training to perfect. Watching a Master Gutter (MG) is mesmerizing. Their hands and arms move with practiced ease, completing each task in flawless sequence. No wasted motion. It’s like riding a bike at first—you’ll fall, scrape a knee, then suddenly you’re soaring.
Tools and setup matter:
- Sharp knives and aprons for all
- Water nozzles at each station
- Buckets for guts
- Containers with ice for hearts, livers, and gizzards (if desired)
- Lung rake (optional)
→ Pro tip: Consider shackles hung from a rod—one per gutter—instead of a shared table. They’re cheaper and deliver key advantages:
- Gravity assists with gut removal
- Mistakes don’t cross-contaminate
- Posture improves as vertebrae stack like pancakes—reducing risk of nerve impingement
Your back will teach you how to sit, stand, walk, and process chickens if you listen. A few extra investments here—like a vent cutter or custom rake—can make you faster, cleaner, and more comfortable. Still waiting on someone to hook a wet/dry vac to a lung rake. Let us know when you do!
Duck #10 – Chill Station
The Chill is both literal and figurative—the part where birds cool down, and you finally do too. You’ll feel it when the “Last bird dead!” call rings out and the final bird hits the tank six minutes later.
Tank Options:
- Stainless chill tanks (CTs) from dairies or restaurant supply (may require added drain valves)
- Food-grade plastic tubs
- Old freezers or stock tanks can work, but don’t sell birds out of those
Ice Tips:
- Freeze water in ice cream tubs or containers ahead of time
- Small ice chills water faster than block ice (more surface area)
Pre-Chill Option:
- Use a “Pink Water” tank (think 50-gal plastic barrel) to take out the first heat and remaining blood before birds enter the main chill tank
- Make sure that barrel was only used for food-grade product (never hydraulic oil, EG)
Other Essentials:
- Water hoses with tight connections
- Plenty of backup ice
- Drying racks
- Bags and labels for packaging
- A spare hose gasket (trust us—makes the difference between smooth and miserable)
→ Pro tip: A longer bleed-out time reduces blood in all downstream ops—including your chill tank.
Duck #11 – Station Layout
Don’t spread out. Tight layouts reduce work. Every step matters.
→ Pro tip: Use crate slides, dunk levers, and stacked crates to reduce heavy lifting and back strain.
- Dunking levers
- Crate slides (PVC rails)
- Stacked crates to avoid bending
And please: Stop lifting 80 lb crates solo. Ask your future self if it’s worth the spine surgery.
Duck #12 – Cut Up
This isn’t technically part of DDay, but it should be. Cut Up adds massive value:
- 2x per-bird income
- 1 min to cut, 2-3 to package
- Use a cutting board or cone
- Mesh glove = safety
→ Pro tip: Learn cut-up and double your value per bird in minutes. Study videos. Practice. Don’t leave money on the table.
With this PPS Guide Sheet in hand, you’re ready for your first—or hundred-and-first—DDay. Go in confident, calm, and prepared.
Good Pluck!

